Showing posts with label kitchen. Show all posts

Thursday, January 7, 2016

Creamy White Turkey Chili with Sweet Corn Cake Recipe

Are you an expert on all things chili? Create a recipe using BUSH'S® Beans and you could be one of two lucky winners (+ guests) selected to be flown to New York for a BUSH’S Beans Kitchen Collaboration Demo Video where you will be paired with BUSH’S Expert Chef Jeffrey Saad who will work with you on ways to mix up your current chili and try your hand at new chili recipes.


Spent the afternoon in my kitchen yesterday. The mission...create an original chili recipe for competition. I just submitted my entry to the Bushs® Beans Chili Cook-Off and I am going to share it with you today. I created a Creamy White Turkey Chili topped with a scoop of Sweet Corn Cake. One of the things I love most about chili is it's versatility. You can switch up the types of beans to your liking. Different meats and vegetables can be mixed and matched depending on what you happen to have on hand any given day (or in my case, what the kids will actually eat). If you prefer a spicier chili, just add a teaspoon of cayenne pepper or crushed red pepper flakes. No matter the state of your pantry, you can almost always make an awesome pot of chili.

Creamy White Turkey Chili 

Chili Ingredients:

20 oz. Lean ground turkey
1 can Bushs® garbanzo beans
1 can Bushs® cannellini beans
1 red bell pepper
1 medium red onion
1 cup frozen corn kernels
8 oz. cream cheese
5 cups chicken broth
2 T minced garlic
1 T cumin
1 T chili powder
1 T oregano flakes
¼ cup lemon juice
salt and pepper to taste

Sweet Corn Cake Ingredients:

8 T butter
1 can cream-style corn
8.5 oz. box corn muffin mix

Sweet Corn Cake Directions:

  1. Melt butter in a microwave safe/oven safe dish.
  1. Add the can of cream corn and muffin mix. Stir well.


  1. Bake in a 350° oven for 40 minutes or until top is golden brown.


Chili Directions:

  1. In a large pot or Dutch oven add the turkey, diced onion, diced bell pepper, garlic and cook on medium-high heat for 10-15 minutes until veggies are tender and meat is browned.


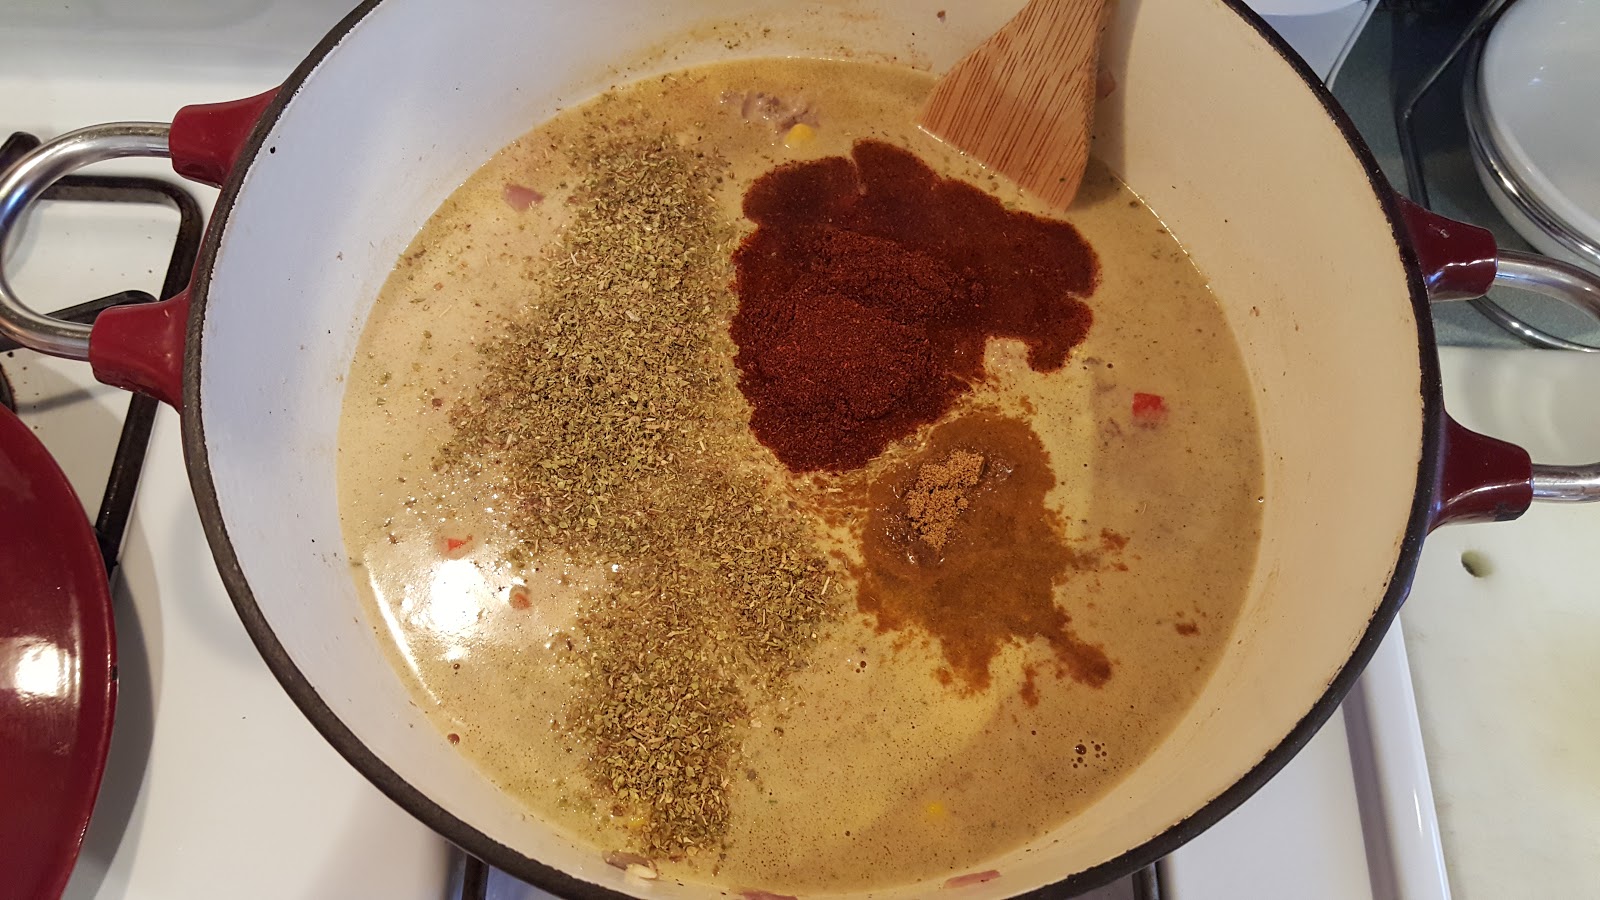
  1. Add the 2 cans of drained beans, corn, broth, cumin, oregano and chili powder. Stir well and bring to a boil. Reduce heat, cover and simmer for 10 minutes.


  1. Add the lemon juice and cream cheese. Stir often until cream cheese is melted. Bring back to a boil. Reduce heat, cover and simmer for 10 minutes.

  1. Salt and pepper to taste. Serve with a dollop of Sweet Corn Cake and enjoy!


Thanks for stopping by! I would love to hear from you if you give these recipes a try. Happy cooking and wish me luck!

Tuesday, January 5, 2016

Curry Spiced Chicken Legs & Rice Pilaf Recipes

Happy New Year All!

One of my goals for 2016 is to fine tune and share more of my own recipes with you. I hope to do so weekly...but we all now how life goes. As my mom says, "Sometimes life just gets all lifey." My intentions are grand, though. Today I will be sharing my recipes for Curry Spiced Chicken Legs and a very easy and versatile Rice Pilaf. I hope you get a chance to try these recipes out and enjoy them, as well!


This dinner recipe combination of chicken, rice pilaf and corn came to $1.87 per serving for 6 people. Each serving consisted of 2 chicken legs, 1 cup of rice pilaf and 1/3 cup of corn. Very budget friendly. Full recipes to follow the photo instructions.


Prepare a baking sheet by covering it with foil. I use an oven-safe baking/cooling rack and place it on the covered baking sheet. This allows the chicken legs to cook evenly all the way around without the need to turn them over during cooking. I spray the baking rack with non-stick cooking spray and preheat oven to 400°.


I purchased a jumbo pack of chicken legs (12 count) for $4.46. Yay!


A little trick that I learned while watching the Food Network for perfectly plump, juicy, easy to eat chicken legs...Using a sharp knife, cut around the base of the chicken leg down to the bone all the way around. (See photo above) This has been a great technique in my home. The meat bites off much easier, especially for my children. Also, all of the little tendons and such stay out of the bites. I find that the kids eat much more of their chicken this way.


Mix all of the spices in a bowl thoroughly. This recipe will yield about a 1/2 cup of rub.


Working with 6 chicken legs at a time, place them in a gallon sized zip lock bag. Drizzle with half of the olive oil, seal and "squish" the oil all over the chicken. Next, add 1/4 cup of the rub, seal again and then shake, squish, and incorporate the spices evenly onto the chicken legs. Place the seasoned chicken onto the prepared baking sheet/rack. Repeat with the rest of the chicken.


Bake the chicken in a 400° oven for 35-40 minutes or to an internal temperature of 185°.


Look how plump, juicy and delicious they are! Not that you can actually taste or smell them through the screen or anything. That would be a neat trick....

While the chicken is baking you could start the rice pilaf. The great thing about this rice pilaf is it's versatility. This recipe is very basic and compares to a "Rice-A-Roni" type of dish. I much prefer this home-made version for both taste and budget friendliness. I used chicken broth in mine but you can use any broth you choose: vegetable, beef, etc. You could omit the vegetables for picky eaters or add in alternates to your liking. If you really want to make this dish sing you could even add toasted almond slivers when you fluff the rice before serving for a little crunch or garnish with diced green onions. The possibilities are endless.


In a large skillet with a tight fitting lid, add the butter, onion, bell pepper, orzo and minced garlic. I like to season with cracked pepper at this point. Cook on medium-high heat until the orzo is lightly browned.

Never worked with orzo and wondering what it is? Orzo is a small rice-shaped pasta. Yummy.


Once the orzo is browned, add the rice and stir well, completely coating the rice with the flavors of the pan. My rice preference is always jasmine rice but any dry white rice will do. Except minute rice...don't use that. Ha!


Add the broth and parsley, stir well and heat on high until boiling. Once it boils, reduce the heat to a simmer and cover undisturbed for 18-20 minutes.


When done, fluff with a fork and it is ready to serve.

When prepared along with the chicken legs, these two dishes would be done right around the same time. During the last five minutes or so of the rice cooking time I microwaved the frozen corn with a little water, butter, salt and pepper. Voila! Dinner is served. Give these a try and let me know how it goes.


Curry Spiced Chicken Legs

Ingredients:

12 chicken legs
4 T olive oil

Rub:

2 T       brown sugar
1 1/2 T salt
1 T       curry powder
1 T       paprika
1 T       garlic powder
2 tsp     cumin
2 tsp     parsley flakes
1 tsp     turmeric
1 tsp     black pepper


1. Preheat oven to 400°. Line baking sheet with foil and place baking/cooling rack on top. Set aside.

2. Cut each drumstick around the base of the leg all the way down to the bone.

3. In a bowl combine all of the rub ingredients and mix thoroughly.

4. Working with 6 chicken legs at a time, place them into a gallon sized zip lock bag and drizzle with 2 T of the olive oil. Seal and rub the olive oil to coat the chicken.

5. Add 1/4 cup of the rub to the chicken legs in the bag, seal and shake well covering the drumsticks completely with seasoning.

6. Repeat with the next 6 chicken legs and place all of the chicken legs onto the prepared baking rack.

7. Bake in the oven for 35-40 minutes or until chicken reaches an internal temperature of 185°.

* Note: This would work well for chicken wings, too! You could even slow cook them in a crock pot all day and then broil them for 5-10 minutes to get them nice and crispy! Mmm!


Rice Pilaf Recipe

Ingredients:

1 C     orzo pasta
1 C     jasmine rice (or white rice of choice)
4 C     chicken broth (or broth of choice)
3 T     butter
1         medium onion
1/2      a bell pepper (color of choice)
1-2 T  minced garlic
1 T     parsley flakes


1. In a large skillet with a tight fitting lid add the butter, diced onion, diced bell pepper, orzo pasta and minced garlic. Cook on medium-high until orzo is lightly browned.

2. Add the rice and stir well, coating the rice in the flavors of the pan.

3. Add the broth and parsley, stir well and heat to boiling.

4. Once it comes to a boil, reduce heat to low, cover and simmer for 18-20 minutes undisturbed.

5. Fluff with a fork and it is ready to serve.

* Note: You can use any broth you choose. The veggies can be omitted or changed as well. Even a bag of frozen peas or corn would work in a pinch. Mix it up!


Thanks for stopping by and happy cooking!


Tuesday, October 6, 2015

Amazing Meatloaf Recipe!

"Meatloaf smeatloaf double beatloaf. I hate meatloaf." We all remember that scene from 'A Christmas Story'...when Mommy is trying to get little Randy to eat his meatloaf...like the piggies do. It makes me giggle every single time.


In my house we have no problem with the meatloaf. It is a family favorite. I recently made meatloaf for our last charity cooking session at Food With Love and the family it was for liked it so much that they asked me for the recipe. So, this one's for you Martinez Family. Enjoy!

I never had a specific recipe before. I remember watching my mom make meatloaf when I was a kid and as an adult it took me a few years and many attempts to get it just the way I love it. I also used to make it in one big loaf pan but have since started making mine into individual sized loaves. This way everyone get a piece with delicious edges and a perfect middle. Yum!

Amazing Meatloaf Recipe

Ingredients:

1 lb. ground beef
1 lb. sausage (I prefer Jimmy Dean regular flavor)
1 sleeve Ritz crackers (or similar, crushed well)
2 Tbsp. minced garlic
1 medium onion (diced small)
1 egg
2 tsp. ground or cracked black pepper
2 tsp. salt
2 Tbsp. ketchup
2 Tbsp. Worcestershire sauce
4 Tbsp. milk

Topping:

ketchup
brown sugar

Directions:

1. Dice the onion small.

2. Place the crackers in a zip lock bag and crush them into very tiny pieces/powder.

3. Place all of the ingredients (except for the 2 toppings) into a large bowl and squish/mix together with your hands until very well incorporated. (I make sure to take off all of my rings and check/clean under my fingernails before doing this step)

4. Divide the meat mixture into 6-8 even portions and form each into a heaping patty shape.

5. Place them on a baking sheet with an edge (or a 9x13 pan would do).

6. Top each individual meatloaf with 2-3 Tbsp. of brown sugar, patting it down a bit and keeping as much of the sugar on the meat as you can. Zig zag ketchup on top of the brown sugar on each loaf.

7. Bake in a 350° oven for @ 35 minutes or until the internal temperature reaches 165°.


As you can see, I left the ketchup off of one loaf since I have a child that does not eat ketchup. Yet another great reason to make them into individual sized loaves. I hope you enjoy this recipe. Please share or comment if you try it out. I would love to hear from you! Happy eating!


Tuesday, April 7, 2015

Butter Flavored Coconut Oil Review


Yum! So, I sit down to write this review and begin uploading the photos to this post and my stomach starts growling quite loudly. Yup. This stuff is good. Real good.

Butter Flavored Coconut Oil made by Golden Barrel in Lancaster County, Pennsylvania. They offer a variety of products like molasses, syrups, oils, sugars, mixes and more. I had the chance to receive a free jar from the company directly in order to try it out and write up a review. I was glad too. I had already been eyeballing their products via the interwebs since I had recently discovered their Instagram feed @goldenbarrelbp. I really want to try their Shoofly Pie Mix. It sounds perfectly delicious.


They asked if I would just give it a try in place of butter for some of my recipes. Why not, right? I thought about the possibilities, deciding that popping popcorn and baking cookies would be an obvious choice. So, I put those two ideas on the back burner for a bit. A couple nights after I received my jar in the mail was a gorgeous Spring night. Here in Minnesota, after a long cold winter, the second it's finally nice enough to grill...we do! Homemade burgers on our Weber charcoal grill is one of my all times faves! That is what I make first nearly every year.

When I have a big juicy burger I love sauteed mushrooms and onions with mine. I cook 'em up in a little butter, minced garlic, salt and cracked pepper. The perfect burger topping in my book. Why not give the coconut oil a try instead?


The butter flavored coconut oil melted perfectly as butter. Smelled pretty good to me, too (...and nothing like coconuts, which my husband was a little worried about...'cuz he and coconuts aren't really friends, you see.)


Anyway, they sauteed up nice and golden. Crisp and tender at the same time. Mmm!


 Piled up nice on my super duper burger. They were wonderfully delicious and lightly butter flavored.

The next night I decided to try it out again since it went so very well. I like to add a layer of vegetables into my pasta dishes sometimes. I love to hide veggies in my childrens' food. Some days more obviously than others. Ha!

Again, they vegetables cooked nicely and tasted very good. I also like the hint of color that the coconut oil gives to the food. The butter flavoring I'm sure.


Within the following week I had an opportunity to use the coconut oil in place of butter when popping kernels for family movie night and in chocolate chip cookie dough for Easter treats. The popcorn turned out perfectly. I didn't even use extra butter afterwards. just some salt and a little white cheddar powder. The cookies were soft and chewy. No one would have guessed I didn't use real butter. All in all a good product and something I would use again. Thank you Golden Barrel for the opportunity.

Where can you get your own Golden Barrel products?

www.GoldenBarrel.com
https://www.facebook.com/GoldenBarrel
https://twitter.com/GoldenBarrelBP
https://instagram.com/goldenbarrelbp/
https://www.pinterest.com/goldenbarrel/

Butter vs. Coconut Oil:

According to Google...

You can read the full article from EatingWell.com HERE


Monday, December 8, 2014

BakeItFun Non-Stick Silicone Baking Mat Review!

<a href="http://www.tomoson.com/?code=TOP06150038e36297212da6e7fcb8aa39de" rel="nofollow"><img style="display: none" src="http://www.tomoson.com/images/front/pixel.png" /></a>


I received an awesome product to review for this time of year. I bake so many cookies for the holidays and a BakeItFun Non-Stick Silicone Baking Mat was exactly what I needed. Today I tried it out for the very first time and I am more than happy to report that it worked flawlessly! 


This handy mat is top rack dishwasher safe, microwave safe and so easy to clean. When they said non-stick they weren't kidding. The cookies slid right off with ease and no crumb residue was left behind. I baked six dozen sugar cookies and only needed to wipe the mat down with a warm wet rag afterwards. So nice! With five kids I go through so many dishes each day. One less difficult dish to wash and I am one happy Momma!


I decided to use a very simple sugar cookie dough for my test run. I rolled the dough into balls and dipped them each in a mix of cinnamon and sugar.


The mat comes with twelve circles printed on it. I baked the first batch with my two year old twin sons and it was so easy for them to place the dough balls. All I had to tell them was to put the dough in the circles and they did it. So adorable! There are also measurements on the edges of the mat for other baking needs, as you can use this versatile mat for so many other kinds of food, too.


The cookies slide right off the mat after cooling for just a couple minutes. As you can see there really is no mess left behind.


The cookies baked so evenly. This is a picture of the top of the cookie and following is a picture of the bottom of the cookie. No burnt edges or bottoms. just beautiful perfect cookies.


I had to decorate some for the holidays, of course. Here is my cute little sugar cookie snowman. My daughter was happy to see him when she got home from preschool.


I also posted a video review on my YouTube channel, in case you would like to swing by and check out the baking mat (or me, hee hee) in action.


Thank you so much for stopping by. This truly is a great product. Works above and beyond all of the other silicone baking mats I have tried in the past. If you try it out, please feel free to come back here and tell me how it works for you. Happy Holidays to you and yours! Bake away!


If you would like to order one for yourself, just click HERE for Amazon.com.

And don't forget to follow BakeItFun. Just click on the following links:


** I received this baking mat for free in order to do my review. I assure you, as always, that my opinions are genuine. **


<a href="http://www.tomoson.com/?code=BOTTOM06150038e36297212da6e7fcb8aa39de" rel="nofollow"><img style="display: none" src="http://www.tomoson.com/images/front/pixel.png" /></a>