Sunday, July 24, 2016

Caramel Iced Coffee Concentrate Recipe


I love iced coffee. Maybe love isn't a strong enough word here. Let's just say that if money were no object than I would go to Caribou every damn day and get myself one. Yum! Kind of like Mary-Louise Parker's character in Weeds who has a to-go cup of the delicious nectar from the addictive bean practically glued to her hand at all times. That would be me...only less stoned.

Image from: http://wholehealthdesigns.com/2011/07/coffee-diet-coke-and-nancy-botwin/

If you enjoy twisted shows where the "heroine" constantly makes poor life decisions yet is somehow adorably lovable and entertaining at the same time...you should watch Weeds. Seriously. Jenji Kohan has got that genius on tap! Love her.

Back to the subject though...Iced Coffees. In April 2013 someone had shared a recipe for this decadent sludge on Facebook and I had to give it a try. It was so good that I saved the recipe for future use. I decided to make another batch up yesterday and went over to my laptop to see if I could find the original recipe link so that I could Pin it. Not much luck. All I know is that it may have started out as a modified Pampered Chef recipe. So, all I can say is that I didn't invent this recipe but I did make an optional modification to it and took nice pictures. The only Pin I could find used a stock photo of coffee and the web link went to a dead website and was created only a year ago so, I'm calling dibs. Ha! Here it is:

Caramel Iced Coffee Concentrate Recipe

Ingredients:


1 1/2 Cups Sugar
2 Cups Water
1 Cup Instant Coffee crystals
1/2 Cup Caramel Sauce
1 tsp. Vanilla extract
1 tsp. Flavor extract of choice (optional)

I decided to add a dram of Butterscotch flavor extract to my batch last night. I imagine many flavors would be available and tasty. Think cinnamon, hazelnut, chocolate and so on. And even if you don't use any at all the coffee drink will still be super good. This was the first time I even tried the extra extract. Do what you like.

Directions:

Bring all of the ingredients in a saucepan to a boil. Allow to cool completely. Store in the refrigerator in an airtight container.

When ready to enjoy, mix 2 Tbsps of concentrate with 8 ozs of milk. Pour over ice and enjoy!

Like yours a little stronger? Just add a little extra concentrate. So easy. So tasty.

Best Ever Coleslaw Recipe

The great thing about coleslaw is that it goes with so many different foods. If you are looking for that perfect yet simple side dish for dinner or a potluck, look no further. This may turn out to be your go to food.


Best Ever Coleslaw Recipe

Ingredients:

1   16 oz bag tri-color coleslaw (or you can shred your own head of cabbage, green, red or both)
1 - 1 1/2  cups mayonnaise
3/4   cup sugar
3 Tbsps   cider vinegar

1. Place the slaw into a large bowl, preferably one with a lid.

2. Add the mayo, sugar and vinegar. Mix very well.

3. Taste it to see if you would like more mayo, sugar or vinegar. Add some if you do, little by little.

4. You can eat it right away but I prefer to cover it and place it in the fridge for at least 15 minutes or so, sometimes longer. It will get a little soupier and the flavors will incorporate better. Give it a good stir just before serving.


I make sure to use it up within a day or two, keeping it refrigerated in the meantime. If you like onions, try adding a small amount of finely chopped white or red onions. It's pretty darn good that way, too. Gives a nice little bite to it.

Fresh Salsa Recipe


Fresh Salsa Recipe

Ingredients:

1   10 - 14.5 oz. can of diced tomatoes with green chilies
3 - 4   Roma tomatoes (or tomatoes of your choice)
1 - 2   medium onion(s)...We usually have yellow onions around but white or red would be tasty               too.
1/3 - 1/2   of a bunch of green onion
1/4 cup   chopped fresh cilantro
1/4 - 1/2 cup   sliced jalapenos, depending on how spicy you like your salsa (I used jarred jalapenos                       but you could use fresh ones, making sure to remove the stem, seeds and veins.)
1 Tbsp.   sea salt
2 Tbsp.   minced garlic

1. Pour the can of diced tomatoes into the blender.

2. Quarter the tomatoes and onions and add them to the blender along with all of the other fresh ingredients. I layer mine just a little.

3. Add the jalapenos, garlic and salt.

4. Blending speed will be up to you. Some people like their salsa chunkier and some like it soupier (That's a word, right?) I personally prefer mine a little chunkier so I use the pulse blending feature in order to have more control. I watch to make sure the veggies are getting pulled down into the blades. If they are not, I take the pitcher off the motor and give it a couple good shakes to mix the liquid and the veggies better and then pulse blend again until it is the consistency I like.

5. Now dip a chip in it and see what you think. Mmm. Good, right?


That is basically it. I pour mine directly into an airtight container. You can keep this salsa in the refrigerator for up to 4 days. Although, you may not have any left by then. (Insert wink here.)

Easy Peasy Mini Pizzas Recipe

MY KIDS LOVE PIZZA!!! My Mom used to make us these mini pizzas when my five brothers and I were kids and I have been making them for mine since they could chew. This is one of the easiest dinners I make for them and goodness knows I love easy!

You can play with the ingredients for this recipe to make your family happy. Topping choices are endless and only you will know which veggies and meats your child(ren) will eat. Make the pizzas your own and have fun with it. Your kids would probably love to help you out in the kitchen, too.


Easy Peasy Mini Pizzas Recipe

Preheat oven to 350°

Ingredients:

1  pack of English muffins (6 count)...I really like the Sourdough ones but any will do.
1  14 oz. can or jar of pizza sauce
12 - 18 ozs.  shredded cheese of your choice
Any toppings you choose (optional)

** Note: If you are using meat, cook it up before hand. For example: ground beef, grilled chicken, Italian sausage, etc. If I am using ground beef, I brown one pound and season it to taste, sometimes adding minced garlic or diced onions, oregano and so on. Whatever I fancy that particular evening.

1. Open all of the English muffins and lay flat on a baking sheet, 12 pizzas total.

2. Spoon sauce evenly onto each English muffin.

3. If you are using any meats or veggies, add them now

4. Pile 2 - 3 tablespoons of shredded cheese onto each pizza.

5. Bake in the oven for @ 10 - 15 minutes or until cheese is melted.


So easy! Sometimes I like to do a BBQ chicken version. Instead of pizza sauce you can use BBQ sauce. Add grilled chicken and garnish them with chopped cilantro and red onions. It is amazing!

Kielbasa & Ranch Potatoes Recipe


Kielbasa & Ranch Potatoes Recipe

Ingredients:

13 - 16 oz Kielbasa (or polish sausage, turkey kielbasa, whichever one you fancy...or have a coupon for...)
4 medium potatoes (again, your choice of potato, I get whatever is on sale)
1 cup frozen or 1 can kernel corn
1 medium onion
1 cup diced bell peppers or sweet peppers (any color, but I hate the green ones)
1 Tbsp. minced garlic
3 Tbsp. cooking oil
1 pouch Ranch seasoning powder

1. Heat cooking oil in skillet or pan. (I prefer my electric skillet for this dish)

2. Wash and then cut the potatoes into bite sized pieces (I leave the skin on for the nutrients) and put in the pan, add the minced garlic and give them a quick stir to coat in oil.

3. While the potatoes begin cooking, dice the onion and bell pepper. Add them to the pan along with the corn.

4. Cut the Kielbasa into bite sized pieces and add to the pan.

5. Sprinkle the Ranch powder over it all and stir it well to coat evenly. 

6. Cover and simmer at @ 325° and stir it occasionally for about 20 minutes or so, just until the potatoes are cooked to your liking. (Some people like theirs softer than others)

Makes @ 6 cups or so.

My kids like to have ketchup on theirs. I like mine with some shredded cheese on top, usually cheddar or colby jack. Maybe even a dash of Red Hot Sauce. This dish is a family favorite. I hope you and yours enjoy it, too!

Happy cooking!

Perfectly Sticky White Rice Recipe


Perfectly Sticky White Rice Recipe

Ingredients:

1 cup Jasmine Rice
2 cups water

1. In a medium sauce pan with lid, stir together the rice and water. (I prefer non-stick pans here)

2. Heat to boiling while uncovered and then stir again.

3. Cover and reduce heat to very low, barely a simmer.

4. Leave it alone. Less is more when cooking sticky rice. Do not stir it. I know it's hard but seriously, put that spoon down. And maybe don't lift the lid a million times like I used to.

5. Simmer for @ 20 - 25 minutes or so. Keep an eye on it until you do not see water bubbling up around the grains anymore. 

6. When you no longer see water, remove from heat and leave covered until ready to use.

This will yield about 3 cups when fully cooked.


That is it. Pretty easy. I try not to stir it too much after it is done cooking in order to help retain the sticky. If you want it to look neat, try scooping the rice onto plates using an ice cream scooper. Gives it that cute rounded top.

Zucchini Craisin Bread Recipe

Ginny's Zucchini Craisin Bread Recipe


Preheat oven to 350°

Ingredients:

1 1/2 cups flour
1 tsp. ground cinnamon
1/2 tsp. baking soda
1/2 tsp. salt
1/2 tsp. ground nutmeg
1/4 tsp. ground cloves
1/4 tsp. baking powder
1 cup sugar
2 cups shredded unpeeled zucchini
1 egg
1/4 cup cooking oil
handful of Craisins (up to 1 cup)
1/2 cup of nuts (optional)

1. In a bowl, mix together the flour, cinnamon, baking soda, salt, nutmeg, cloves and baking powder. Set aside.

2. In a separate mixing bowl or standing mixer, combine the sugar, zucchini and eggs until just mixed. Add in the oil and mix again.

3. Add flour mixture to the wet ingredients and stir until combined.

4. Gently fold in the Craisins (and the nuts, if you are using any).

5. Pour the batter into a greased loaf pan @ 5"x9"x3" (or any pan of similar size ie: 8x8, 9x9)

6. Bake in the oven for approx. 55 - 65 minutes or until a toothpick or butter knife inserted comes out clean.

7. Cool for about 10 - 15 minutes and enjoy. (I like mine sliced and covered in butter or spread.)

** Alterations: If you are looking for a heartier bread, try using half white flour and half whole wheat flour.

** Note: I keep mine in the refridgerator, heat up slices in the microwave as needed and use it all up within a few days.


5 Pound Lasagna Recipe


Ginny's 5 lb. Lasagna Recipe

Ingredients:

1 lb. ground beef
1 lb. sliced pepperoni
1 lb. your favorite shredded cheese
1 lb. Lasagna noodles, cooked and drained
2  14 oz. cans of your favorite flavor diced tomatoes, lightly drained
1 bag of fresh spinach leaves or 2 cans of spinach, drained

Cook ground beef in skillet. Add minced garlic, diced onions and/or any Italian style seasonings you like. Drain fat and then stir in the 2 cans of drained diced tomatoes. Set aside. Cook lasagna noodles and drain, then set aside. In a 9" x 13" deep pan, layer all of the ingredients. I start with 1/3rd of the ground beef/tomato mixture on the bottom, @ 4 - 5 noodles to cover, 1/3rd pepperoni slices, 1/3rd of the spinach, 1/3rd of the shredded cheese and then repeat these layers 2 more times. You will have 3 total layers and end with cheese on top. Bake in the oven at 350 degrees for @ 30 minutes. Eat!

Friday, January 15, 2016

Loaded Potato Stacks Recipe for Competition

I just took "The Ordinary Extraordinary Potato Recipe Contest" from FoodNetMag.com!

I took the idea of a good old fashioned loaded baked potato and turned it on it's head, creating a beautiful "stack" of deliciousness. Wish me luck!


Loaded Potato Stacks Recipe
(serves 4)

Ingredients:

2-3    large red potatoes
4       slices bacon – cooked and crumbled
¼ C  green onion – diced
2 T   olive oil
8 oz  cream cheese – softened
¼ C  sour cream
¼ C  shredded cheddar – chopped small
3 T   Dijon mustard
         salt and pepper

Directions:
  1. Wash potatoes and remove any eyes and blemishes. Cut off the ends of each potato. Slice the rest of the potatoes into 1/2” thick slices, you will need 12 slices total.
  2. In a bowl, toss the 12 potato slices with the olive oil, salt and pepper, coating well. Place the prepared potatoes on a cookie sheet and bake at 350° for 30 minutes, turning over once during cooking time.


  1. In a standing mixer whip together the cream cheese, sour cream, Dijon mustard and chopped cheddar until smooth and creamy. Place cheese mixture into a piping bag.


  1. To assemble the potato stacks, start with one potato slice topped with 2 T of the cream cheese mixture. Add another potato slice and top with 2 T of the cream cheese mixture. Add the last potato slice and top with 1 T cream cheese mixture. Garnish with the crumbled bacon and green onions. Repeat for all 4 servings. Serve immediately.


Voila! A gorgeous side dish that is scrumptious and surprisingly easy! Bring a little fancy to a classic side dish. Enjoy!

Festive Wild Rice Casserole Recipe

I just submitted this recipe to the Taste of Home "Merriest Potluck Recipe" contest. When I was a child my all time favorite holiday dish to eat was my Grandma Adeline's wild rice casserole. I would always go back for seconds...OK, who am I kidding, thirds. As an adult I was able to get the recipe but it didn't taste as good as I remembered. So, I played around with her recipe and created this dish. A staple at my own family holiday gatherings now. Yummy! I hope you love it, too.

If you would like to view this recipe on the Taste of Home website, you can do so by clicking HERE.


Festive Wild Rice Casserole

Ingredients:

1 C wild rice - cooked
8 oz cream cheese - softened
½ C sour cream
8 oz mushrooms
1 onion
1 T minced garlic
3 T butter
2 tsp black pepper
2 tsp salt
½ C dried cranberries
½ C slivered almonds – toasted

Directions:

  1. In a large skillet add the butter, diced mushrooms, diced onion and minced garlic. Cook on medium-high heat until soft and lightly browned, about 10 minutes.


  1. In a standing mixer combine softened cream cheese, sour cream, salt and pepper until smooth and creamy.


  1. In a large bowl combine the cooked wild rice, mushroom/onion mixture, cream cheese mixture, most of the dried cranberries and most of the toasted almonds, reserving some cranberries and almonds for the garnish.


  1. Pour the wild rice mixture from the mixing bowl to a greased 9 1/2” baking dish (or similar). Top with reserved dried cranberries and toasted almonds. Serve immediately or refrigerate until needed. Reheat when ready in a 350° oven until heated through, about 30 minutes.


If you would like to read how to toast almond slivers, click HERE.

If you would like to read how to cook wild rice, click HERE.

And that's the scoop! Let me know if your try this one out. Happy cooking, ya'll!

Thursday, January 7, 2016

Creamy White Turkey Chili with Sweet Corn Cake Recipe

Are you an expert on all things chili? Create a recipe using BUSH'S® Beans and you could be one of two lucky winners (+ guests) selected to be flown to New York for a BUSH’S Beans Kitchen Collaboration Demo Video where you will be paired with BUSH’S Expert Chef Jeffrey Saad who will work with you on ways to mix up your current chili and try your hand at new chili recipes.


Spent the afternoon in my kitchen yesterday. The mission...create an original chili recipe for competition. I just submitted my entry to the Bushs® Beans Chili Cook-Off and I am going to share it with you today. I created a Creamy White Turkey Chili topped with a scoop of Sweet Corn Cake. One of the things I love most about chili is it's versatility. You can switch up the types of beans to your liking. Different meats and vegetables can be mixed and matched depending on what you happen to have on hand any given day (or in my case, what the kids will actually eat). If you prefer a spicier chili, just add a teaspoon of cayenne pepper or crushed red pepper flakes. No matter the state of your pantry, you can almost always make an awesome pot of chili.

Creamy White Turkey Chili 

Chili Ingredients:

20 oz. Lean ground turkey
1 can Bushs® garbanzo beans
1 can Bushs® cannellini beans
1 red bell pepper
1 medium red onion
1 cup frozen corn kernels
8 oz. cream cheese
5 cups chicken broth
2 T minced garlic
1 T cumin
1 T chili powder
1 T oregano flakes
¼ cup lemon juice
salt and pepper to taste

Sweet Corn Cake Ingredients:

8 T butter
1 can cream-style corn
8.5 oz. box corn muffin mix

Sweet Corn Cake Directions:

  1. Melt butter in a microwave safe/oven safe dish.
  1. Add the can of cream corn and muffin mix. Stir well.


  1. Bake in a 350° oven for 40 minutes or until top is golden brown.


Chili Directions:

  1. In a large pot or Dutch oven add the turkey, diced onion, diced bell pepper, garlic and cook on medium-high heat for 10-15 minutes until veggies are tender and meat is browned.


  1. Add the 2 cans of drained beans, corn, broth, cumin, oregano and chili powder. Stir well and bring to a boil. Reduce heat, cover and simmer for 10 minutes.


  1. Add the lemon juice and cream cheese. Stir often until cream cheese is melted. Bring back to a boil. Reduce heat, cover and simmer for 10 minutes.

  1. Salt and pepper to taste. Serve with a dollop of Sweet Corn Cake and enjoy!


Thanks for stopping by! I would love to hear from you if you give these recipes a try. Happy cooking and wish me luck!

Tuesday, January 5, 2016

Curry Spiced Chicken Legs & Rice Pilaf Recipes

Happy New Year All!

One of my goals for 2016 is to fine tune and share more of my own recipes with you. I hope to do so weekly...but we all now how life goes. As my mom says, "Sometimes life just gets all lifey." My intentions are grand, though. Today I will be sharing my recipes for Curry Spiced Chicken Legs and a very easy and versatile Rice Pilaf. I hope you get a chance to try these recipes out and enjoy them, as well!


This dinner recipe combination of chicken, rice pilaf and corn came to $1.87 per serving for 6 people. Each serving consisted of 2 chicken legs, 1 cup of rice pilaf and 1/3 cup of corn. Very budget friendly. Full recipes to follow the photo instructions.


Prepare a baking sheet by covering it with foil. I use an oven-safe baking/cooling rack and place it on the covered baking sheet. This allows the chicken legs to cook evenly all the way around without the need to turn them over during cooking. I spray the baking rack with non-stick cooking spray and preheat oven to 400°.


I purchased a jumbo pack of chicken legs (12 count) for $4.46. Yay!


A little trick that I learned while watching the Food Network for perfectly plump, juicy, easy to eat chicken legs...Using a sharp knife, cut around the base of the chicken leg down to the bone all the way around. (See photo above) This has been a great technique in my home. The meat bites off much easier, especially for my children. Also, all of the little tendons and such stay out of the bites. I find that the kids eat much more of their chicken this way.


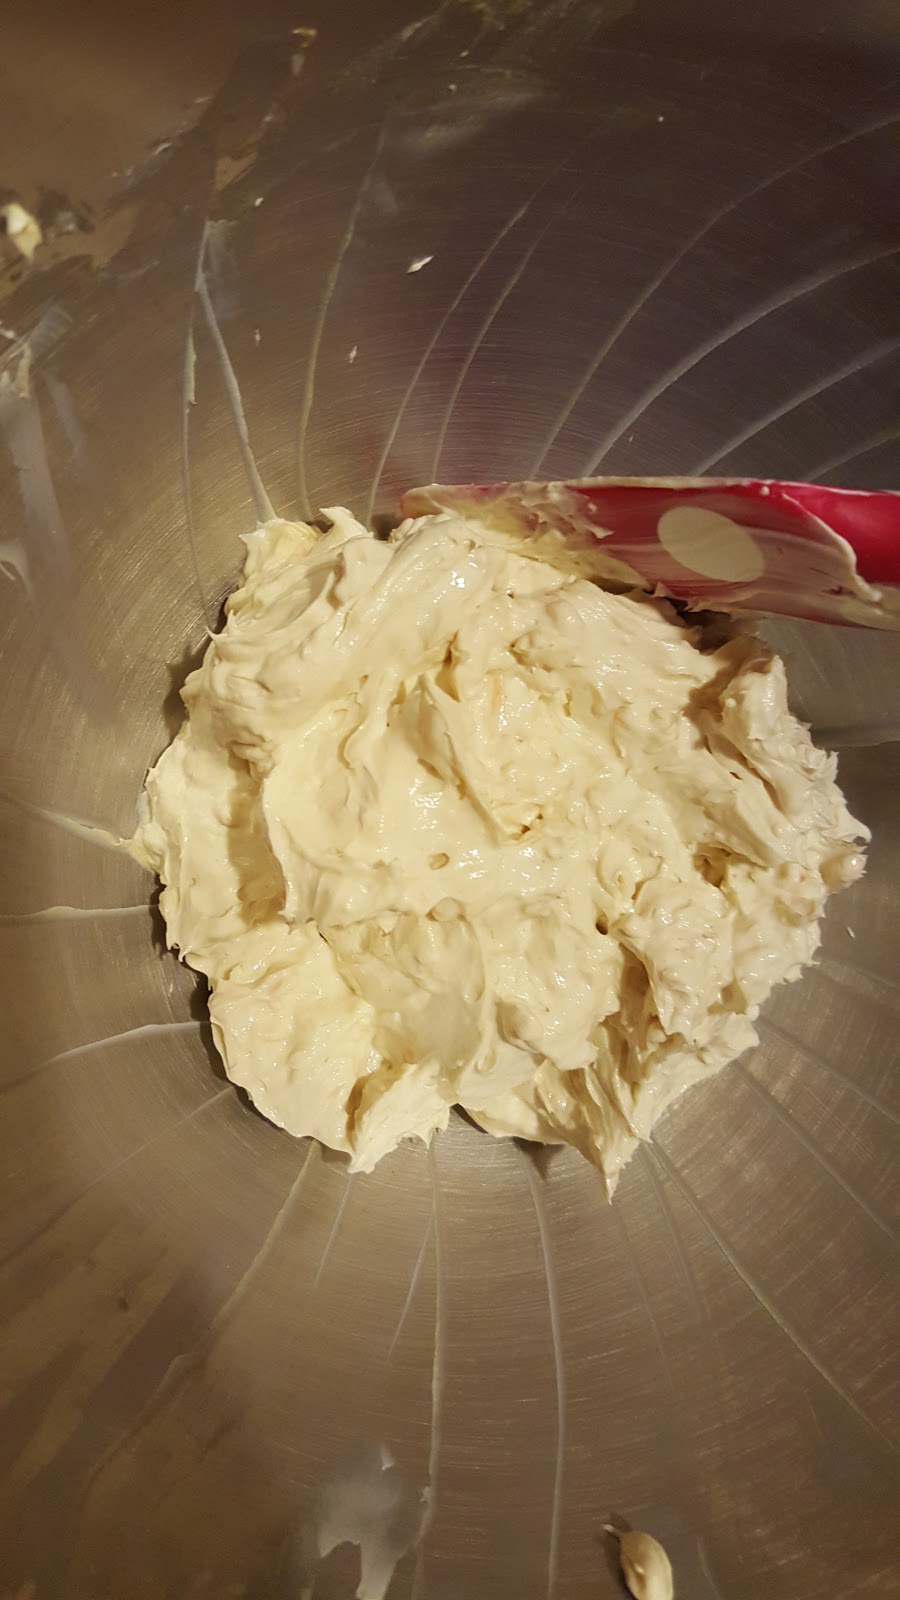
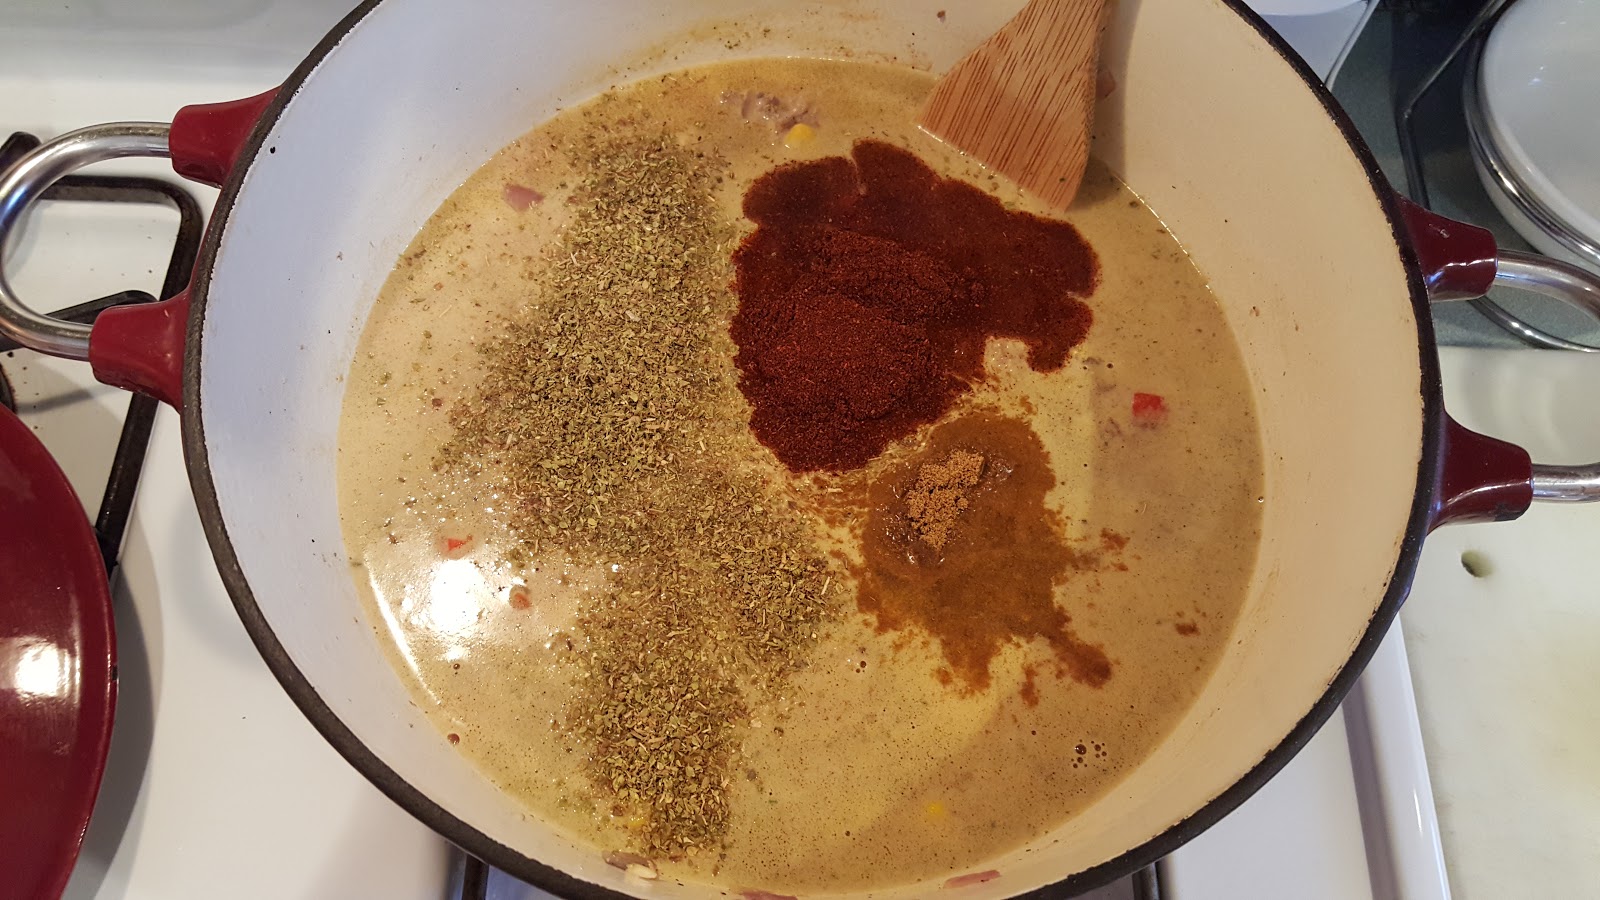
Mix all of the spices in a bowl thoroughly. This recipe will yield about a 1/2 cup of rub.


Working with 6 chicken legs at a time, place them in a gallon sized zip lock bag. Drizzle with half of the olive oil, seal and "squish" the oil all over the chicken. Next, add 1/4 cup of the rub, seal again and then shake, squish, and incorporate the spices evenly onto the chicken legs. Place the seasoned chicken onto the prepared baking sheet/rack. Repeat with the rest of the chicken.


Bake the chicken in a 400° oven for 35-40 minutes or to an internal temperature of 185°.


Look how plump, juicy and delicious they are! Not that you can actually taste or smell them through the screen or anything. That would be a neat trick....

While the chicken is baking you could start the rice pilaf. The great thing about this rice pilaf is it's versatility. This recipe is very basic and compares to a "Rice-A-Roni" type of dish. I much prefer this home-made version for both taste and budget friendliness. I used chicken broth in mine but you can use any broth you choose: vegetable, beef, etc. You could omit the vegetables for picky eaters or add in alternates to your liking. If you really want to make this dish sing you could even add toasted almond slivers when you fluff the rice before serving for a little crunch or garnish with diced green onions. The possibilities are endless.


In a large skillet with a tight fitting lid, add the butter, onion, bell pepper, orzo and minced garlic. I like to season with cracked pepper at this point. Cook on medium-high heat until the orzo is lightly browned.

Never worked with orzo and wondering what it is? Orzo is a small rice-shaped pasta. Yummy.


Once the orzo is browned, add the rice and stir well, completely coating the rice with the flavors of the pan. My rice preference is always jasmine rice but any dry white rice will do. Except minute rice...don't use that. Ha!


Add the broth and parsley, stir well and heat on high until boiling. Once it boils, reduce the heat to a simmer and cover undisturbed for 18-20 minutes.


When done, fluff with a fork and it is ready to serve.

When prepared along with the chicken legs, these two dishes would be done right around the same time. During the last five minutes or so of the rice cooking time I microwaved the frozen corn with a little water, butter, salt and pepper. Voila! Dinner is served. Give these a try and let me know how it goes.


Curry Spiced Chicken Legs

Ingredients:

12 chicken legs
4 T olive oil

Rub:

2 T       brown sugar
1 1/2 T salt
1 T       curry powder
1 T       paprika
1 T       garlic powder
2 tsp     cumin
2 tsp     parsley flakes
1 tsp     turmeric
1 tsp     black pepper


1. Preheat oven to 400°. Line baking sheet with foil and place baking/cooling rack on top. Set aside.

2. Cut each drumstick around the base of the leg all the way down to the bone.

3. In a bowl combine all of the rub ingredients and mix thoroughly.

4. Working with 6 chicken legs at a time, place them into a gallon sized zip lock bag and drizzle with 2 T of the olive oil. Seal and rub the olive oil to coat the chicken.

5. Add 1/4 cup of the rub to the chicken legs in the bag, seal and shake well covering the drumsticks completely with seasoning.

6. Repeat with the next 6 chicken legs and place all of the chicken legs onto the prepared baking rack.

7. Bake in the oven for 35-40 minutes or until chicken reaches an internal temperature of 185°.

* Note: This would work well for chicken wings, too! You could even slow cook them in a crock pot all day and then broil them for 5-10 minutes to get them nice and crispy! Mmm!


Rice Pilaf Recipe

Ingredients:

1 C     orzo pasta
1 C     jasmine rice (or white rice of choice)
4 C     chicken broth (or broth of choice)
3 T     butter
1         medium onion
1/2      a bell pepper (color of choice)
1-2 T  minced garlic
1 T     parsley flakes


1. In a large skillet with a tight fitting lid add the butter, diced onion, diced bell pepper, orzo pasta and minced garlic. Cook on medium-high until orzo is lightly browned.

2. Add the rice and stir well, coating the rice in the flavors of the pan.

3. Add the broth and parsley, stir well and heat to boiling.

4. Once it comes to a boil, reduce heat to low, cover and simmer for 18-20 minutes undisturbed.

5. Fluff with a fork and it is ready to serve.

* Note: You can use any broth you choose. The veggies can be omitted or changed as well. Even a bag of frozen peas or corn would work in a pinch. Mix it up!


Thanks for stopping by and happy cooking!