Showing posts with label easy. Show all posts

Tuesday, May 5, 2015

Bacon Wrapped Sweet Peppers Recipe

I must admit...this recipe was not entirely my idea. The hubby went up to the butcher shop a couple weeks ago and came home with these beautiful cream cheese stuffed bacon wrapped jalapenos. They looked great but I am not a fan of eating whole jalapenos. I like them in other foods like salsa and such but that's just me. I happened to have a whole bag of mini sweet peppers in the fridge and thought I should give it a try with those instead. It was one of the appetizers I made for my hubby's birthday happy hour party I hosted here at the house. Appetizers, cocktails and cupcakes. He is a lucky man. Lol!


Bacon-Wrapped Sweet Peppers Recipe

Ingredients

@ 20 Mini sweet peppers
@ 10 slices of bacon
1 8 oz. tub whipped cream cheese
2 Tbsp Dried minced onions
Garlic Salt & Pepper to taste
splash of milk (optional)

Directions

1. Cut tops/stems off sweet peppers and hollow out all of the seeds and veins. Seeding the peppers is a great job for a child who likes to help in the kitchen. Especially since they have smaller fingers.

2. Whip together cream cheese, onions & seasonings until creamy. Add milk only if it is too thick to pipe through a bag. Not too runny though or it will leak out of the peppers.

3. Pipe the cream cheese mixture into each mini pepper until just full. If you do not have a piping bag, a butter knife works well also.

4. Cut each slice of bacon in half and spiral wrap one around each stuffed pepper. I made sure to have a  bit of bacon over the cream cheese side to keep as much cheesy deliciousness inside as possible.

5. Place on baking sheet (with edges) lined with parchment paper about 2" apart. Bake at 350° for 30-40 minutes. Keep an eye on them and take out as soon as the bacon is cooked to your liking. Consider draining the bacon grease out about half way through baking time.

That's it. Super easy and so good. They will be very hot though so try not to eat them too soon, I know it will be difficult though. Ha!

Hope you love 'em! Happy eating ya'll!

Friday, May 1, 2015

Imitation Crab Meat Lettuce Wraps Recipe


Welcome to the new and improved 'Ginny Says So' blog. As you can see, we had a makeover today. I originally started this blog to review products and services of all types and to host the occasional giveaway. It has always been heavy on the cooking side of things and seeing as I just launched my very own personal chef business last month, I feel it's only fitting to dive right in and devote this blog to my true happy place...my kitchen!

Today, I wanted something yummy and new for lunch. I was feeling under the weather yesterday and only ate a bit of white rice because nothing else sounded very good. That means today I was super hungry! While digging through the refrigerator I came across a pack of imitation crab meat that I had purchased especially for me. Score! But what to do with it? I turned to Pinterest...as usual.

That's what I do. It took me quite a while to embrace the whole Pinterest thing but once I did I was completely sold. I actually have my boards set up like a recipe book for easy reference. You can see for yourself by clicking HERE. It really is an amazing resource where food and recipes are concerned. But, I never end up using recipes the way they are written. I modify them. I know what I like and I make it so. It's what I call a 'Pinterest Twist.'

You can see the original recipe that I found right HERE.

This is how I made them...

Imitation Crab Meat Lettuce Wraps Recipe

Ingredients

1             16 oz. package of imitation crab meat (If you have real crab, use it you lucky duck)
1             cucumber
1             Roma tomato
2 tbsp     green onions
3/4 - 1 cup sour cream
1 tbsp     Dill weed
1 tsp       onion salt (hubby's idea)
1 tbsp     lemon juice
Lots of cracked pepper and extra salt
Romaine lettuce leaves

Directions

Chop the imitation crab meat into about 1/2" chunks.

Dice the cucumber, tomato and green onions and toss together in a bowl with the crab meat.

Add the rest of the ingredients, except the lettuce, and mix gently, adding more salt and/or pepper if desired.

Add a couple spoonfuls of crab meat mixture into each lettuce leaf and eat them. Eat them all. Just kidding, you should probably share some.


So, easy and so good. Hope you enjoy them and pretty please share pictures or comments if you do.

You can find me on Facebook at https://www.facebook.com/flavorfare

Or visit my website at http://www.flavorfare.com


Monday, December 8, 2014

BakeItFun Non-Stick Silicone Baking Mat Review!

<a href="http://www.tomoson.com/?code=TOP06150038e36297212da6e7fcb8aa39de" rel="nofollow"><img style="display: none" src="http://www.tomoson.com/images/front/pixel.png" /></a>


I received an awesome product to review for this time of year. I bake so many cookies for the holidays and a BakeItFun Non-Stick Silicone Baking Mat was exactly what I needed. Today I tried it out for the very first time and I am more than happy to report that it worked flawlessly! 


This handy mat is top rack dishwasher safe, microwave safe and so easy to clean. When they said non-stick they weren't kidding. The cookies slid right off with ease and no crumb residue was left behind. I baked six dozen sugar cookies and only needed to wipe the mat down with a warm wet rag afterwards. So nice! With five kids I go through so many dishes each day. One less difficult dish to wash and I am one happy Momma!


I decided to use a very simple sugar cookie dough for my test run. I rolled the dough into balls and dipped them each in a mix of cinnamon and sugar.


The mat comes with twelve circles printed on it. I baked the first batch with my two year old twin sons and it was so easy for them to place the dough balls. All I had to tell them was to put the dough in the circles and they did it. So adorable! There are also measurements on the edges of the mat for other baking needs, as you can use this versatile mat for so many other kinds of food, too.


The cookies slide right off the mat after cooling for just a couple minutes. As you can see there really is no mess left behind.


The cookies baked so evenly. This is a picture of the top of the cookie and following is a picture of the bottom of the cookie. No burnt edges or bottoms. just beautiful perfect cookies.


I had to decorate some for the holidays, of course. Here is my cute little sugar cookie snowman. My daughter was happy to see him when she got home from preschool.


I also posted a video review on my YouTube channel, in case you would like to swing by and check out the baking mat (or me, hee hee) in action.


Thank you so much for stopping by. This truly is a great product. Works above and beyond all of the other silicone baking mats I have tried in the past. If you try it out, please feel free to come back here and tell me how it works for you. Happy Holidays to you and yours! Bake away!


If you would like to order one for yourself, just click HERE for Amazon.com.

And don't forget to follow BakeItFun. Just click on the following links:


** I received this baking mat for free in order to do my review. I assure you, as always, that my opinions are genuine. **


<a href="http://www.tomoson.com/?code=BOTTOM06150038e36297212da6e7fcb8aa39de" rel="nofollow"><img style="display: none" src="http://www.tomoson.com/images/front/pixel.png" /></a>


Wednesday, July 16, 2014

Squeasy Snacker Review & Giveaway!


Time for another review and giveaway! I found an opportunity through TopMommyBlogs.com and was chosen to receive and review three of these new Squeasy Snackers to try out on my four year old daughter and not quite two year old twin sons. As a mother, I love to find new things that will make my life easier and a little bit cleaner. Honestly, it is exhausting constantly cleaning up after all the kiddos day after day after mess-making day.

I did receive my Squeasy Snackers for free in order to do my review, but I assure you that my opinions will be honest, as always. I will admit, I was not 100% sure how this product was going to stand up to my twins, who I sometimes call "Masters of Destruction." They can usually dismantle and destroy anything their chubby little hands can reach but these snackers passed my test. Ha! They truly did work great.


I received three of the 6 oz. Squeasy Snackers shown above, one each in blue, turquoise and pink. One of my lucky readers will be the winner of this same package (an almost $45 value)! Keep on reading ;-)


Yes, yes. The child covered in pudding is adorable. I am sure we all have pictures of our own children very similar to this one. If you are like me, after the first couple of times doing this and then having to carry a pudding (or something like it) covered slippery child immediately into the bathtub, clean them all up, get their clothes to the laundry room, somehow find time to get back to the kitchen in order to clean the highchair and the floor and...I am sure you get my point. It gets old quick. There are many foods I actually avoid feeding my toddlers because it just isn't worth all of the clean up. Now I don't have to worry about that anymore! Woot woot!


So what exactly do we have here? A reusable, no spill OR free flowing reusable food pouch that is top rack dishwasher safe and freezer friendly. What?! This is so great. I have actually looked at the store bought, pre-packaged pouch foods for my kids at the local stores. They really are not in my budget for how little you get for the price. I also recently read in the news that some of these store bought pouch products, I think it was an applesauce, was found to have mold in it. No thank you, I say. I want to know what is going into my childrens' tummies and with these snackers I can do just that.


My first test...Applesauce. The snacker bottles have a pretty wide mouth and I was able to just pour it right from the jar into their bottles. No mess, no extra dishes. Nice!


The bottles are simple to use and are easy to take apart for filling and cleaning.


For the applesauce I tried it with the spill proof insert and without. Either way worked just fine for the kids.


Eddie can open and close the lid by himself.


Zayne was able to slurp his applesauce to his little heart's content.


Even Daphne enjoyed her new Squeasy Snacker! And guess what? No one spilled anything!


Next test...Milk. The bottle stands nice and upright and can also be stood on it's cap.


Ooh!


Ahh!


Oh! As you can see, there is cereal and crumbs on the table but absolutely NO applesauce or milk. I am one happy Momma!


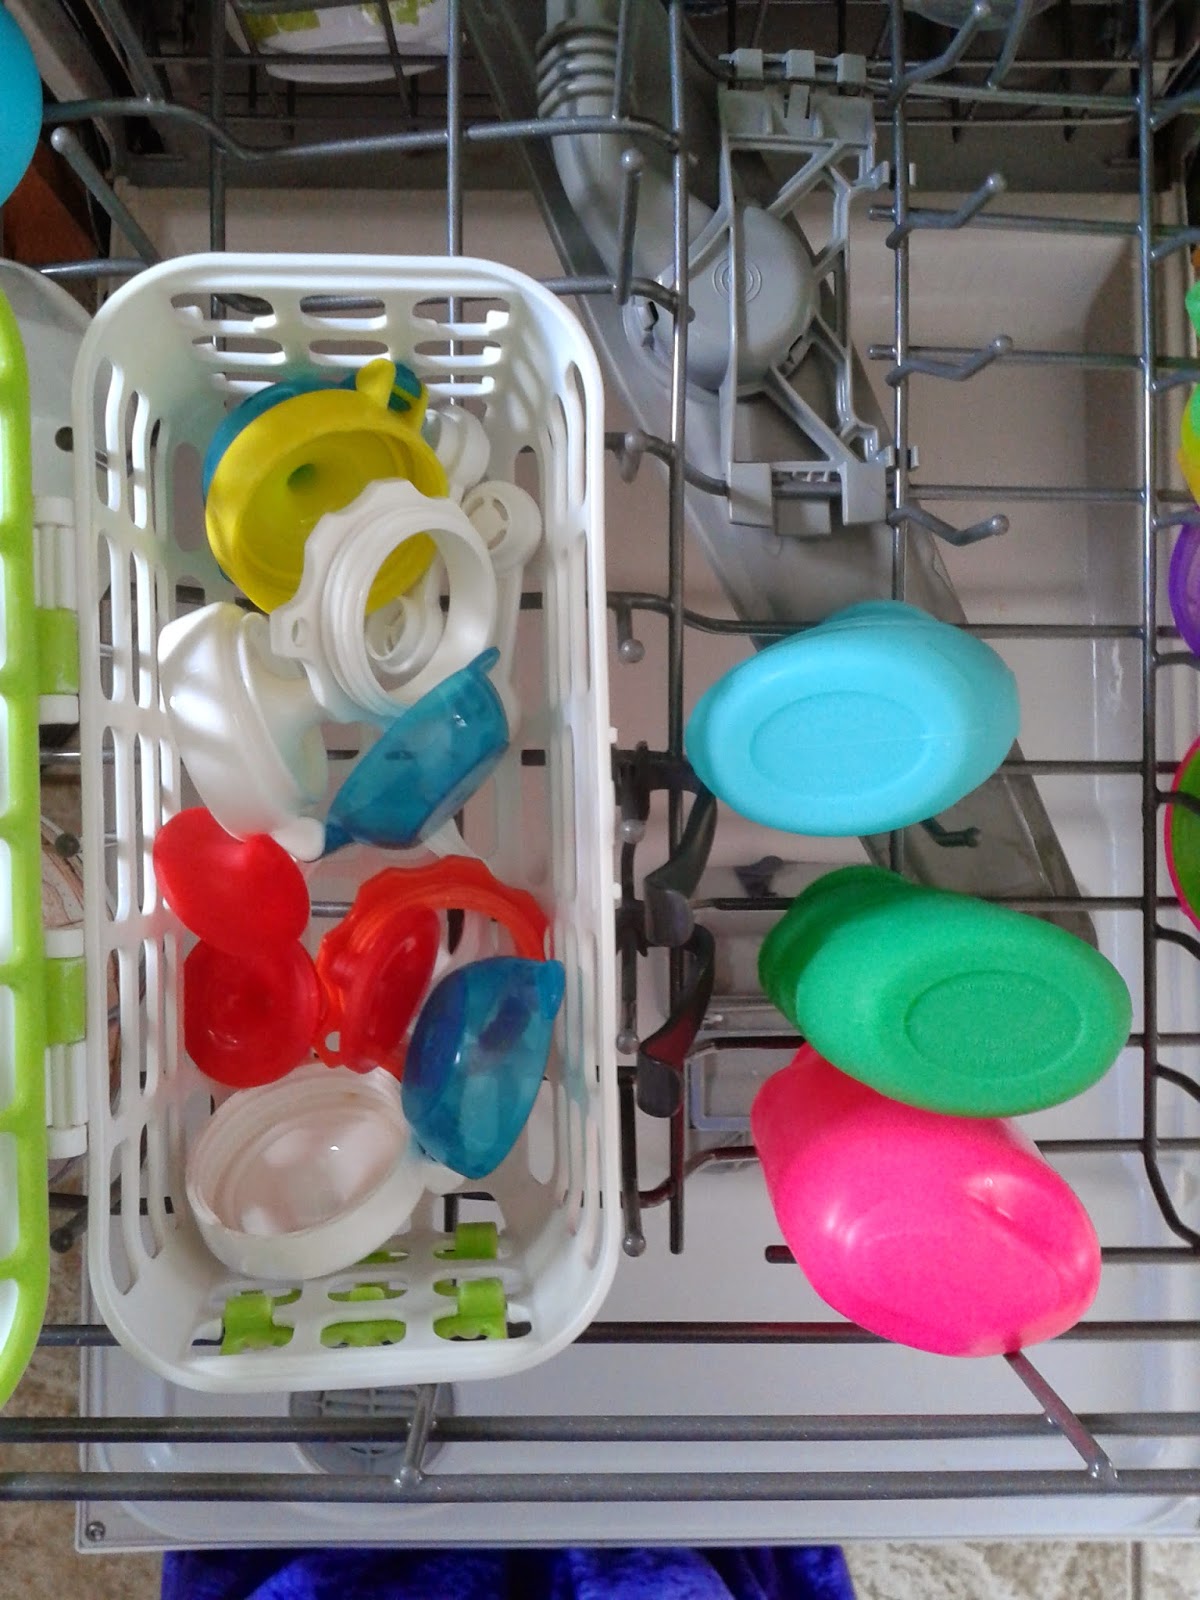
The snacker bottles turn inside out for super easy cleaning.


I washed them in the top rack of my dishwasher using my old bottle/nipple basket for the smaller pieces and they came out perfectly. I will definitely be using these on the kiddos often. Easy peasy!

Please take a moment to visit the website at www.squeasygear.com and also LIKE their Facebook page at https://www.facebook.com/squeasygear.

And now for the giveaway! Good luck :-)


a Rafflecopter giveaway